If you live in a small apartment with a studio balcony, the idea of growing your own food might seem out of reach. However, with a DIY vertical lettuce garden, you can transform your balcony into a green, productive space—perfect for fresh salads, garnishes, and more.
In this step-by-step guide, we’ll walk you through creating your own vertical garden, using simple materials and methods that will fit even the most compact of spaces.
Why Choose Lettuce for Vertical Gardens?
Lettuce is one of the best choices for vertical gardening because it grows quickly, doesn’t require a lot of space, and can thrive in cooler temperatures. Additionally, lettuce is a low-maintenance crop, making it perfect for beginners and small-space gardeners.
Here are a few reasons why you should consider growing lettuce vertically:
- Space-efficient: Vertical gardens maximize space by utilizing walls, fences, or balcony railings.
- Easy to maintain: Lettuce doesn’t need much care or attention and can be harvested in as little as 30 days.
- Continuous harvest: With proper care, you can enjoy fresh lettuce all year round.
- Aesthetic appeal: A lush, green lettuce garden will add natural beauty to your studio balcony.
What You’ll Need for Your DIY Vertical Lettuce Garden
Creating a vertical lettuce garden is simple and requires only a few basic materials. Here’s a list of what you’ll need:
Materials:
- Vertical planters or containers – These can be pre-made vertical garden systems or simple materials you can repurpose, like PVC pipes or old wooden crates.
- Soil – Choose a lightweight potting mix that drains well.
- Lettuce seeds or seedlings – Opt for leaf or butterhead varieties like Romaine or Butterhead, which are great for vertical gardening.
- Tools – A small shovel, scissors for pruning, and a watering can or hose with a gentle spray nozzle.
- Trellis or wall mount – If you’re using containers, you’ll need something to mount them vertically, such as a trellis, wooden pallet, or balcony railing.
- Waterproof liner – If you’re using repurposed materials (like wooden crates), a waterproof liner will help keep the soil from damaging your balcony surface.
Steps to Build Your Vertical Lettuce Garden
Step 1: Choose Your Location
Find the best spot on your studio balcony that gets at least 4-6 hours of sunlight per day. Lettuce thrives in full sun but can also tolerate partial shade, especially during the hotter months.
Step 2: Select Your Vertical Planter Design
There are many DIY designs you can create for your vertical garden, depending on your space and materials available. Here are a few options:
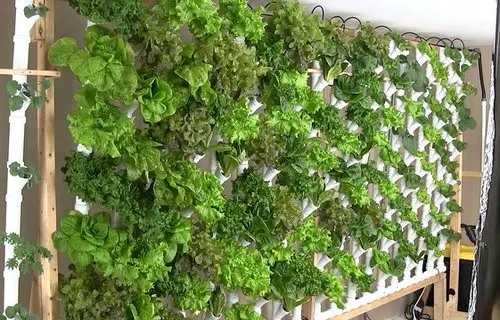
- PVC Pipe Tower: Use a tall PVC pipe with drilled holes to create a tower of lettuce plants. This design is space-efficient and easy to water.
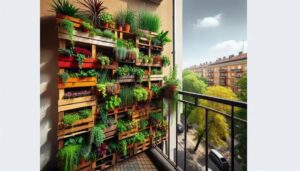
- Repurposed Wooden Pallet: Attach a wooden pallet vertically to your balcony wall and fill each slat with soil to plant lettuce. It’s simple and rustic.
- Hanging Planter Boxes: Suspend several planter boxes or containers on a railing or hook system. This option works well if you have limited space.
Step 3: Prepare Your Planters
Whichever design you choose, make sure your planters have good drainage. Add a layer of gravel or stones at the bottom of each container to help with drainage. Fill with high-quality potting soil and leave enough space at the top to plant your lettuce seeds or seedlings.
Step 4: Plant Your Lettuce
Lettuce can be grown from seeds or small seedlings. If you’re using seeds, plant them about 1/4 inch deep in the soil and cover lightly. For seedlings, space them about 6-8 inches apart to allow room for growth.
Step 5: Watering and Maintenance
Lettuce doesn’t require frequent watering, but it does need consistent moisture. Water the plants early in the morning to avoid mold and ensure the soil is evenly moist but not soggy. Check the soil daily, especially during the hotter months, as containers tend to dry out faster than garden beds.
Prune the outer leaves of your lettuce regularly to encourage new growth, and remove any yellow or damaged leaves to maintain plant health.
Step 6: Harvesting Your Lettuce
Lettuce grows quickly, and depending on the variety, it can be ready for harvest in as little as 30 days. Harvest by cutting the outer leaves when they reach a desirable size, leaving the inner leaves to continue growing. If you prefer to harvest the entire head, wait until it forms a dense, compact bunch before cutting it at the base.
Benefits of Growing Lettuce Vertically on a Balcony
- No yard needed: Vertical gardens are perfect for renters or those with limited outdoor space.
- Fresh, organic produce: Homegrown lettuce is pesticide-free and healthier than store-bought varieties.
- Low maintenance: Lettuce requires minimal effort once established, making it a great choice for busy individuals.
- Sustainable living: Growing your own food reduces your carbon footprint and gives you more control over your food sources.
Troubleshooting Common Issues
Yellowing Leaves
This is usually a sign of nutrient deficiencies. Consider adding a balanced fertilizer or compost to replenish nutrients in the soil.
Pests
Though lettuce is generally pest-free, aphids or snails may sometimes appear. Use natural repellents or neem oil to deter pests, or manually remove them.
Overcrowding
If your lettuce starts to look crowded or leggy, thin out some of the plants to allow more space for growth. This will also prevent diseases from spreading.
Conclusion: Create Your Own Green Oasis
A DIY vertical lettuce garden for your studio balcony not only helps you grow fresh produce but also adds beauty to your living space. With the right materials and a little effort, you can enjoy a continuous supply of crisp, healthy lettuce all year round.